Bah. bored and waiting for the servers so I thought I would actually post these. < >.< >
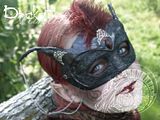
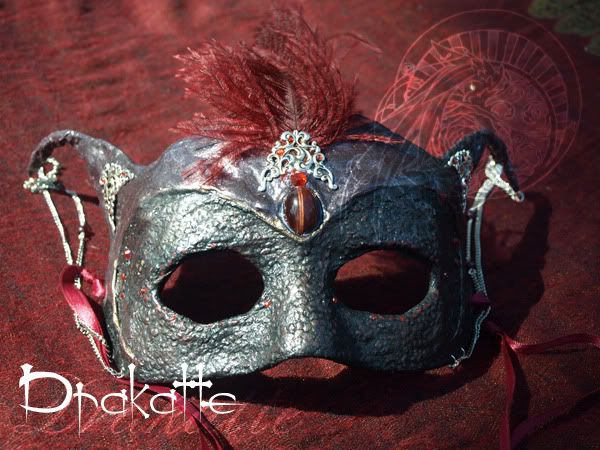
I finally finished my very first paper-mache mask. It was a lot of fun to make, but very time consuming. This one was made for a friend of mine. <3
Another view:

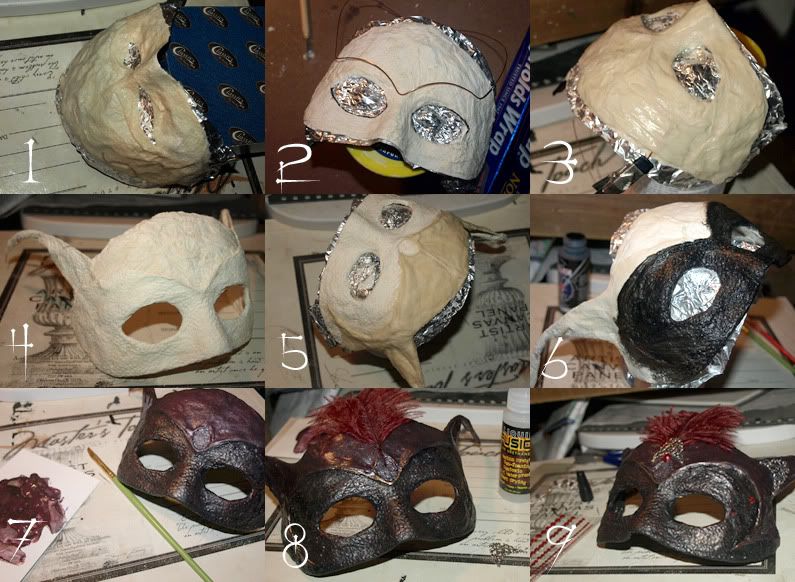
And some process shots of it's creation - because I can. *see below for descriptions*
 Step 1.
 Made a lightweight tinfoil mold for the basic shape & laid down the first layer of mache. It's a mix of flour, salt, and water + paper towels!... < O.O' > Fun fun!
Step 2. Allowed the 1st layer to dry, laid down a 2nd layer of paper towels and let that dry as well. Then I stenciled the eye holes and trimmed the mask shape so it was clean and approximately how I wanted it to be shaped. Then I cut a piece of soft copper wire to frame the horns and clamped it down in shape.
Step 3. Using tissue now as it has a smoother texture, the 3rd layer went into place over the wires and was allowed to fully dry again. To the mache mix this layer I also added a small amount of wood glue, to help strengthen it a bit.
Step 4. The 4th layer of mache was a little more complex as I upped the amount of wood glue again and went back to the paper towels, but carefully trimmed one single sheet to fit the shape I wanted. The texture of the paper towel provided the 'scale' effect on the lower portion of the face. <3 The horns were wrapped with this mixture as well before the 4th layer was placed on the top half of the mask in the next step.
Step 5. Tissue in mah blender! For this layer I made a new mixture of mache using flour, salt, wood glue, pureed tissue paper, and a little water. I turned this mix into a sort-of 'putty' that was then smoothed over the upper half of the mask. I was careful to measure the bezel area for the forehead gem to be sure it would fit securely once the mask was dry. This layer was fully dried and then sanded until it was fairly smooth.
Step 6. It's Paintin' time! <3 I started with a layer of matte black acrylic paint on the lower half of the mask, let it dry, then brushed a very light layer of a color I've dubbed "black pearl" - pearlescent additive + black + red + purple. The black pearl was brushed onto the very tops of the texture but not into the grooves, giving a bit more depth to the color.
Step 7. The top half of the mask was coated in 2 layers of 'black pearl'. Then I used darker crimsons mixed with a touch of pearl and some venetian golds to pick out scales here and there and add more contrast and texture to the lower scaling. The scales around the eyes were touched up with more crimson and the temples brushed with a little venetian gold. Then the entire mask was dried, varnished, dried again, and varnished a 2nd time for good measure.
Step 8. Now the fun really started as I got to begin embellishing the mask. First I glued in place the feather and began adding crimson rhinestones to the corners of the eyes, forehead, and temples. Not very many were used, just enough to give it some 'flash'.
Step 9. Added in some silver plated brass nouveau stampings and embellished them with a few more rhinestones. Not shown is the final step of gluing the dragon's eye gemstone into place on the forehead or adding the chains & garnet bead spacers that run between the horns and the cheeks. Also at this point I pounded in the grommets on the corners that help to reinforce the ribbons that tie the mask in place. A final touch up and re-varnishing of a couple areas and then a crimson velvet lining was cut to fit and glued onto the back of the mask.


Amazing, and thanks so much
That's really epic Light o.o
--Stays a lonely Seele
Wow Light! This looks