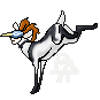
At the request of the lovely Rell, I've put together a little step-by-step guide on how I do my lineless art. Since it was Rell who suggested I post something like this, I chose her character Owlet as the subject.
Please read more, as this contains quite a few large pictures.
Note: All work on this picture is done with a Wacom Bamboo tablet, Adobe Photoshop Elements 6, on a Macbook Pro. I work LARGE when I work on pictures, beginning with a canvas that is usually 3000X3000 pixels. Most of the initial sketch work is done zoomed to 50%, and then when I add colour I work in 100%.
Step 1:

Each picture for me begins with a quick gesture-esque drawing to get the basic shape and movement down. For this picture I chose a pose that, while it doesn't make sense from a gravitational perspective, I think captures the grace of the character.
As a note, all pictures I draw of TEF deer, whether or not they have human faces, begins with the shape of a deer face, as I find it easier to get the feel that way.
Step 2:

Next I neaten the original sketch, try to add a few more details here and there, and fix any little anatomy flaws I can find. I still try to leave the sketch rough however, and the true detail doesn't come until later. In this case, I tried over and over again to give Owlet the owl face that I wanted, and each time it just did NOT want to work. Instead, I settled on giving him a deer face with owlish markings.
Step 3:

This is the key step to the entire process. For a pose like this, where everything flows seamlessly together, and there aren't a lot of added parts, I do a new layer of flat colour over the entire body. As I go around, I touch up little mistakes that I notice here and there. Once the flat colour is to my liking (no obvious problems when I zoom out), I lock the layer's pixels so that I don't have to later go around tidying up for going outside my 'lines'.
Step 4:

Next I add the initial darkest shade tones to block out the shape of the subject. I work with my flat colour slightly transparent, and follow my initial sketch as to where the shade needs to be. To choose the shade colour, depending on the picture, I generally choose a colour a few shades darker than my flat colour, but with the same intensity. I do all of this work with a very soft brush, but in rough strokes.
Step 5:

Now I blend in the shade by using progressively larger (but still soft) brushes with colours that get lighter from the initial shade until they are only slightly darker than the flat colour. For this one, I didn't blend the face shades due to the knowledge that I was going to be changing the colour of the face later.
Step 6:

Next I add highlights by the same method, using a soft brush with a shade of red slightly lighter than the flat colour.
Step 7:

And then I blend the highlights where needed, by the same method as I did the shades.
Step 8:

Now I can add the markings. In this step I added a beige colour to the face to mimic the round owl-face. Using the same methods as before, but on a smaller scale, I add shades and highlights to the face, as well as the nose and eye. For the eye I generally work in 200% zoom, as I find it easier to control.
I also here add the bit of feathering to the face. To do this I simply use the smudge tool very small (1-2px) and drag the beige softly into the red.
Step 9:

In this step I added the colour to the hooves, and the long hair on the tail and ears. For hair I use a combination of a few steps:
First I unlock the flat layer and add hair streaks in a darker shade usually of a width of 1-2px. Next I add streaks over top of that in a slightly lighter shade, again in 1-2px. Finally, I use the smudge tool again, in a similar size, to both drag the flat colour into the hair streaks, and to drag the hair out of the flat colour to give it a more whispy appearance. I also added beige spots to the deer, mimicking the markings some owls have.
Step 10:

Now that the body is complete, I add the antlers in a new layer by the same methods (flat colour, shade, highlights). I also changed their size and angle slightly from the original sketch.
Step 11:

Now I added the final feathers for the design. The biggest problem for this was the lines connecting the feathers to the body, but I used the elliptical marquee tool to create smooth(ish) lines. These were done via 2 new layers.
Final Product:

Finally we're done, with a bit of tweaking as to positioning of things, and then some merging and cropping, we have our final product!
-Trigger


Epic AND informative (and a
Hooray! I'm glad I support a
...at...noon...
:B
Wow, that looks amazing... I
Good work! /track for use
/track for use
Thanks Spyrre! ^^ And thank
And thank you Silensia, I'd love to see others try it out!
NICE!!! This really explained
Lovely tutorial :3
Thank you Kiraki! ^^
o0 epic.
Aww, thanks Fire!
MUAHAHA. NOW I KNOW YOUR
D: Ohnooooes! How did you
Ohnooooes!
How did you know I was an android?!?!