Welcome to another tutorial! This time I'll be showing you how to make a
signature.
Please read on for the rest of the information!
What is a signature?
Your signature is something that shows up at the end of each of your comments (see below). It can be an image, a phrase, even a link to another location. Your signature can be something personal to you, or it can be an image of your character, or even just a simple design that you think looks good.
For the purpose of the tutorial, I've used the most common signature idea, being that of an image.
Step One

The first step to making an image signature is to
upload your desired image to a host site such as
Photobucket.
If you're unfamiliar with how to upload an image, this
tutorial that I created a little while ago can give you the basics.
Once you're image is uploaded,
copy the IMG code to the left of your picture.
Step Two
Once you have your IMG code copied, proceed to the Endless Forest Community Site
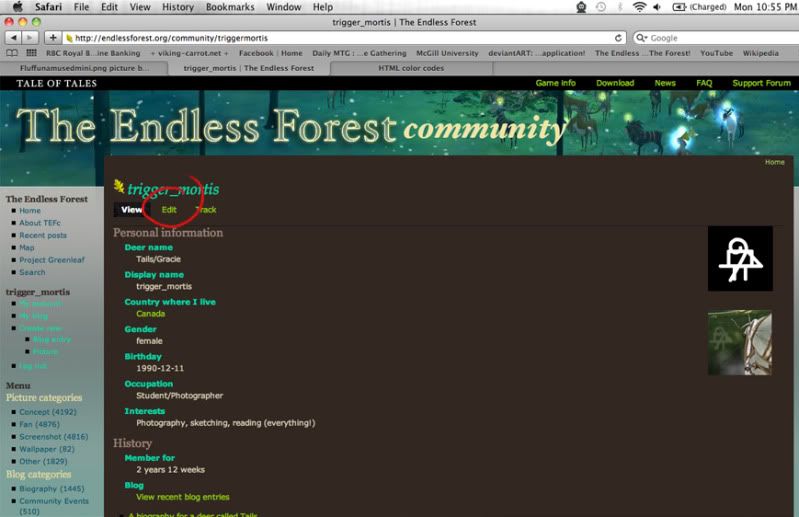
On your main account page (accessed via
My Account in the bar to the left), you want to click
Edit just underneath your name.
Step Three
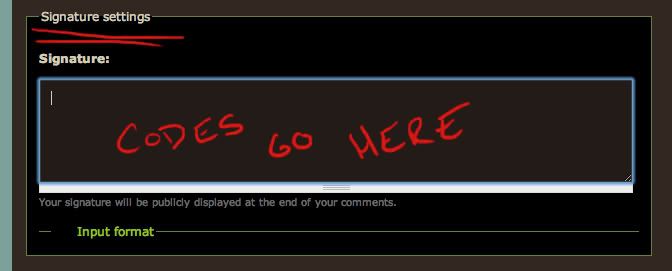
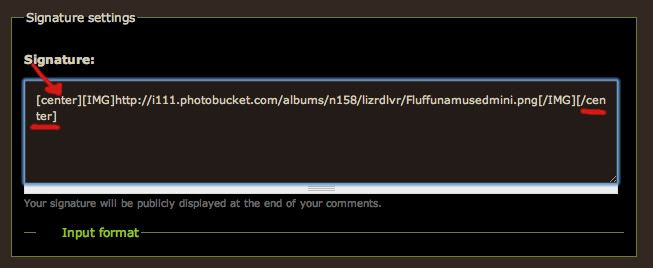
On your account editing page, scroll down until you see a box titled
Signature Settings. It is in the text box inside here that you write all of the codes for your signature, as shown.
Step Four

Inside the text box,
paste your IMG code from Photobucket. Make sure that the url is between the IMG tags in order for it to show up.
Once you've pasted your code, scroll the page down further and click the button at the bottom of the page that says
Save.
Step Five
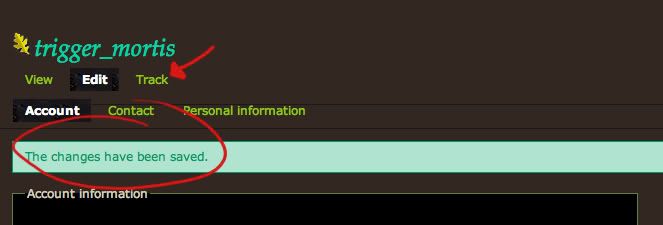
If your save was successful, this message should show up at the top of your screen.
To double check how your signature looks, next click on
Track at the top of your screen beneath your name.
Step Six
Once you're in your track log, click on any page that you've posted, and then scroll down to where your comment is. If you successfully created a signature, it should show up in your old comment.
Note: There are some exceptions to this. To be safe, go to a newer post rather than an older one.
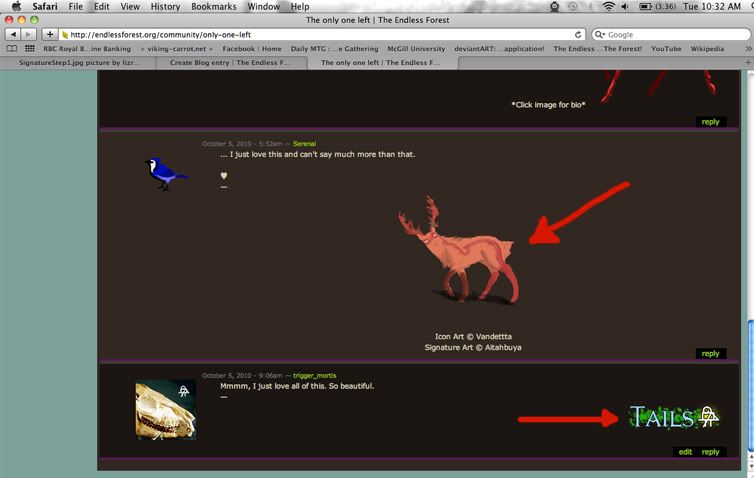
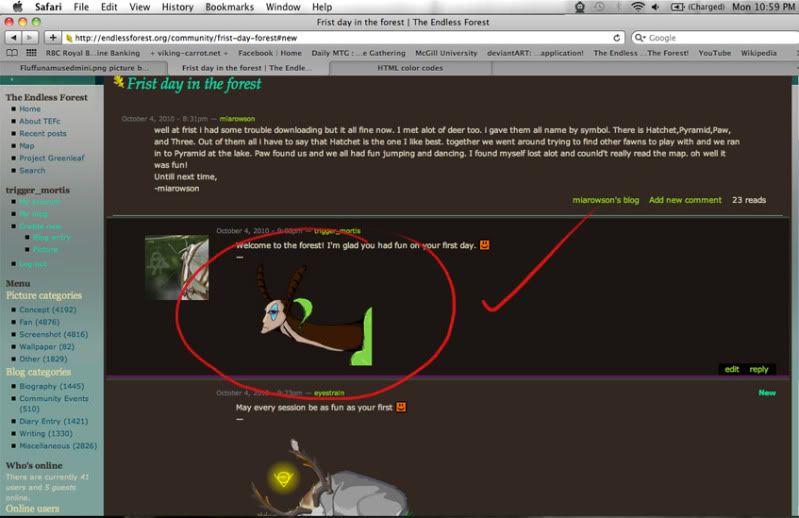
Notice how a default signature falls on the
left of the comment box, underneath where your message is.
Congratulations! You've just made your very own basic signature!
But how do I change the position of my signature, or make it into a link?
Below I will show you the easy ways to change your coding to shift your signature to the center, or right of the comment box, and how to turn that signature into a link.
Shifting the Signature to the Center
Go back into your account editing page, and scroll down to the Signature box once again.
Inside the box this time, around your image code, you want to place CENTER codes. Putting center codes around any bit of text or coding will center it on the page, or in your comment box.
Double check by going back to a comment that you've made, and you should see something like this:
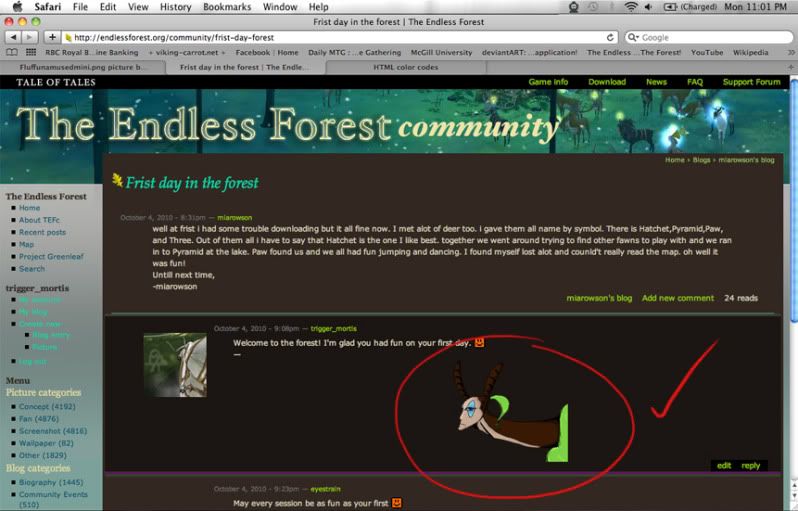 Congratulations! You've now centered your signature!
Shifting the Signature to the Right
Congratulations! You've now centered your signature!
Shifting the Signature to the Right
Once again, go back to your account editing page and scroll down to the signature box.
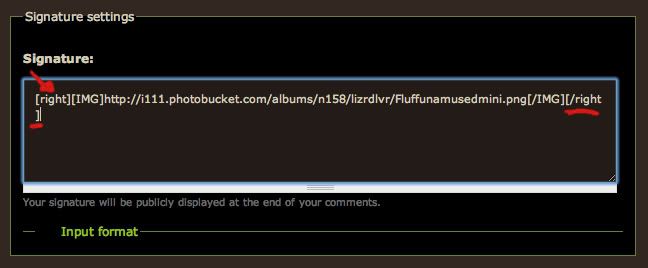
This time, instead of CENTER tags, you want to use RIGHT tags. Similar to the center tags, right tags will shift your image or text to the right of a page or comment box.
Double check once again, and you should see something like this:
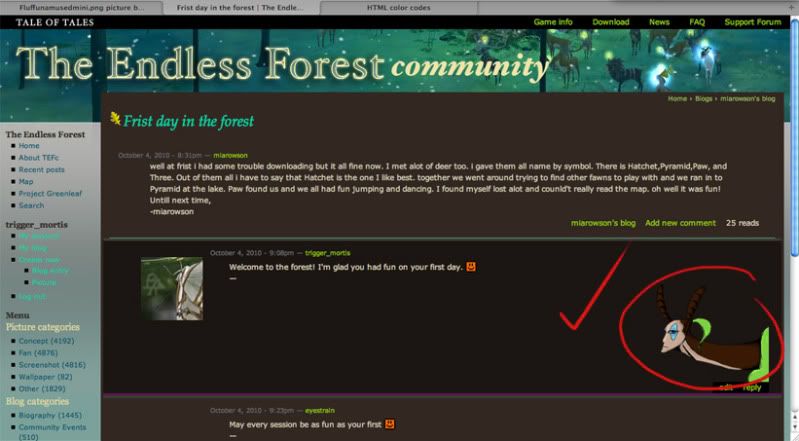 Congratulations! You've just positioned your signature to the right!
Turning your Signature into a Link
Congratulations! You've just positioned your signature to the right!
Turning your Signature into a Link
Your signature can also be an easy way for people to access your character's bio, or an update page, or something else that you want to link to.
For this tutorial, I've chosen my character Tails' bio as the place that I want my signature to link to.

First you want to find the
url of the place you want to link to. Once you have it,
copy it.
Go back to your account editing page, and scroll down to the Signature box.
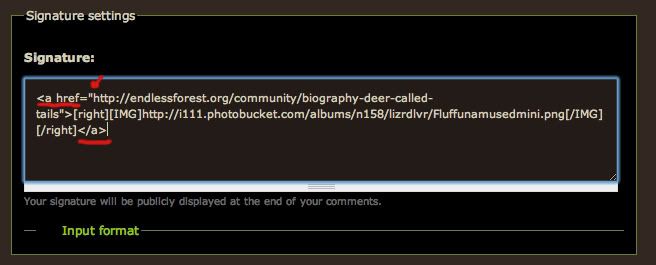
Inside your box, you want to use A HREF tags to indicate where you're linking to.
Note the format of the tags, and how the url has
quotations ("...") around it. This is
necessary for the link to work!
Paste your url between the quotations, and then save your changes.
You can double check if it worked by going back to a page that you posted on, and clicking on your signature. If
nothing happens, then go back and check your coding to make sure that all your tags are closed, and that you have quotations in the correct places. If your link works, then
congratulations! You've successfully turned your signature into a link!
Those were the basics on how to make a signature. There are a few more tricks, but I suggest keeping your signature simple and easy to use.
Hope this has helped!

Thank you again for putting
I don't strive to be the best, but instead I strive to do my best, and always give it my all every time.
-faunet
Thank you for the comment
<3
This is a very neat tutorial
-tracks this for the next
^^ Just here to help!
hey trigger, you have to read
Thank you for the tutorial!!!
OH! Now I have it! It's
You're very welcome Maryruth,
Must you sign up in the
I believe you do have to sign
I think that the common
Thank you!!!
Alright, for anyone
Username: TEFstorage
Password: forest2011
I ask that no one abuse this account, but it is free for anyone to store images on.
This helped a lot thanks!!!!
You're very welcome! I'm glad
Thanks!
I don't know if you'll answer
The background appears transparent and iv'e attempted many things and none work.
Can anyone help me please?
If you want an image with a
track this