Hello, everyone! I'm gonna teach you a neat way to give your Endless Forest screenshots a fancy new look. I'll just be covering the basics, so I encourage you to experiment and look up other tutorials on the internet for more tricks!
--->
***
I assume you have a basic understanding of Photoshop 7 or any equivalent program. If you need specific help, please ask me!***
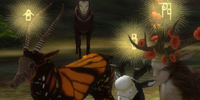
Step 1: Shoot, Crop, Resize
Cropping and resizing your images can really improve your shots. The photo I used was resized from 1000x720 to 400x286! Once you have your image, you can follow these steps...
Step 2: Duplicate
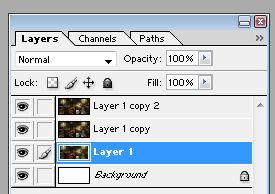
Duplicate your image two times. You should now have three layers (see below). You won't be altering the first one at all, so don't worry about it.
Step 3: Settings
This is where we get technical. I have an image here to help you:
*
(the "Background" layer serves no purpose... I just forgot to delete it)
See the drop-down box that says "Normal"? Head there for these next steps:
1) Set LAYER 1 COPY to SCREEN
2) SET LAYER 1 COPY 2 to SOFT LIGHT
(You will not be working with LAYER 1)
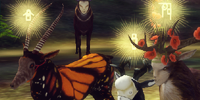
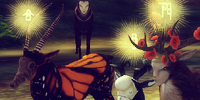
Your image should look like this:
You can see how even a few settings can really alter a picture!
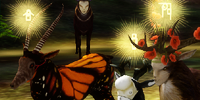
Step 4: The Magical Exclusion Layer
Create a new layer. Fill it with #09002E, which is a navy-blue (almost black) color. Set this layer to EXCLUSION. Your image should look like this:
 Step 5: Fine-Tuning
This is where everything comes alive. Remember: every picture is different. You will need to adjust these settings for every project. Each picture will have different lighting, colors, etc. Please refer back to the image in
Step 3. For this step, you'll alter the OPACITY settings.
Here are the OPACITY settings for the final image:
1) LAYER 1 - nothing
2) LAYER 1 COPY - SCREEN, OPACITY 93%
3) LAYER 1 COPY 2 - SOFT LIGHT, OPACITY 59%
4) LAYER (?) - EXCLUSION, 36%
EDIT: I FORGOT TO MENTION:
SHARPEN the layer you set to SOFT LIGHT two or three times. This will make the picture less blurry.
And there you have it! Have fun!
 Again, if you have any questions, please feel free to ask!
See you in the Forest!


Wow, those screenshot
My screenshots will never be
By the way, I took your pictogram and made the background transparent. You could use it if you like? D:
I'm glad you both like it.
And Pepokeen, thanks for making my rune transparent! It looks so much better.
:0 I knew how to do that,
XD I tried out the
I tried out the technique, and it's amazing how beautiful my screenshot came out! It looks so shiny and clear compared to what it looked like before.
(Gosh, that sounds like some kind of annoying little product review, doesn't it? XD)
@Her: Actually what gave me
@Adagio: What a handsome deer! I think "shiny and clear" should be the slogan for the tutorial.
Hmm, I'll have to try that
I was wondering how you did