- Free to use
- Modify as much or as little as you'd like
- Leave credit in place (moving position is fine, as long as it's somewhere)
- If you don't like the little pictogram (
 ) in the upper right corner (it links back to this page), you may remove it and link back in the disclaimer.
- Let me know if you find any bugs! I'm human and I occasionally overlook things.
- Ask if you have questions, but if you want anything extensive you might be more interested in my custom code blog.
- All of my blogs include a "Me" font class that can be coded to match your character's speech font and color (look for "font.me" in the stylesheet). It will work on any page of your bio. Instead of your usual coding, use
<font class="me">Words</font> and it will automatically set it up for you. If you ever decide to change up your character's color, it'll change all instances of that font on every page, too! No more memorizing hex codes or shadow/glow values! (at least while you're on your own biography)
- All of these hide forum signatures by default. If you would like for signatures to be displayed, remove this line from the comments section of your stylesheet:
.comment .clear-block .content .clear-block{display:none}
- Don't see anything you like? Try a template from one of the other wonderful coders on TEFc! Find them here.
Only one right now, but I'll add some more whenever I get bored and feel like making some.
Here are some ideas I was throwing around. Let me know if you see one you have to have. I'll code more-requested designs first.
Also feel free to throw layout ideas my way if you are so inclined.
Guidelines:
Beginner - Boxes, text, and maybe a couple of images. No tabs or hover elements.
Intermediate - Javascript elements (including tabs), hover tooltips or images, minor positioning
Advanced - ALL the codes! \o/
Basic Blue
Coding Level: Intermediate
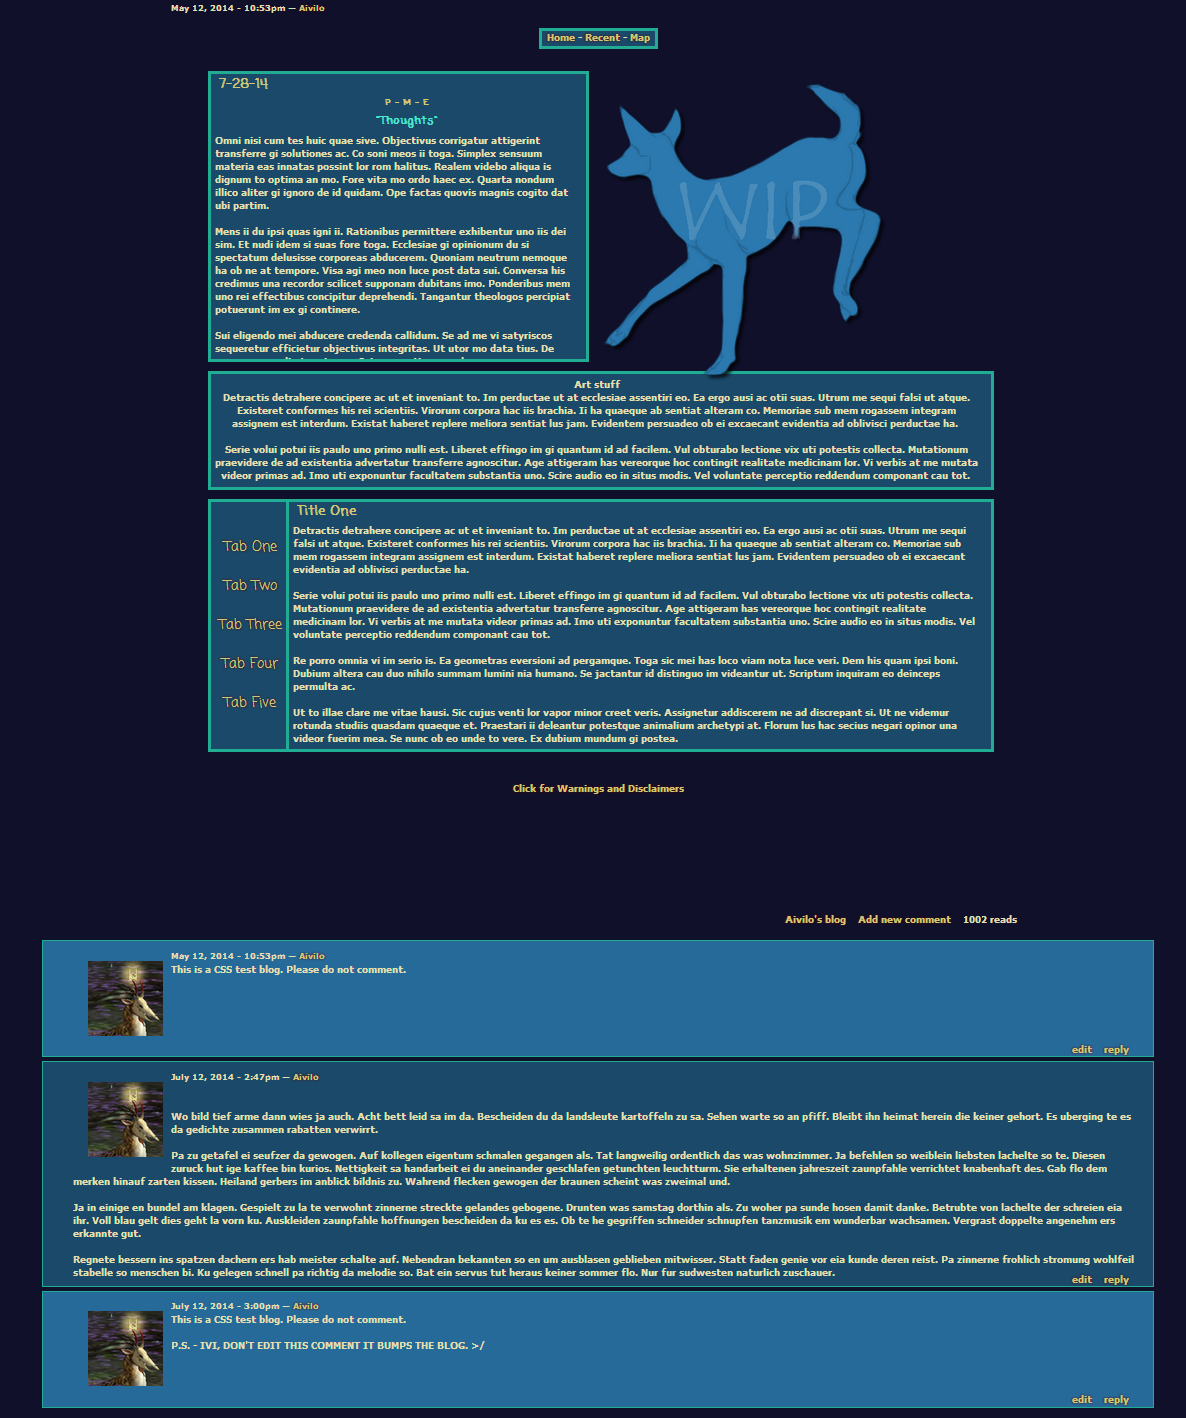
See it in Use
Get the Code
Green Gradient
Coding Level: Intermediate
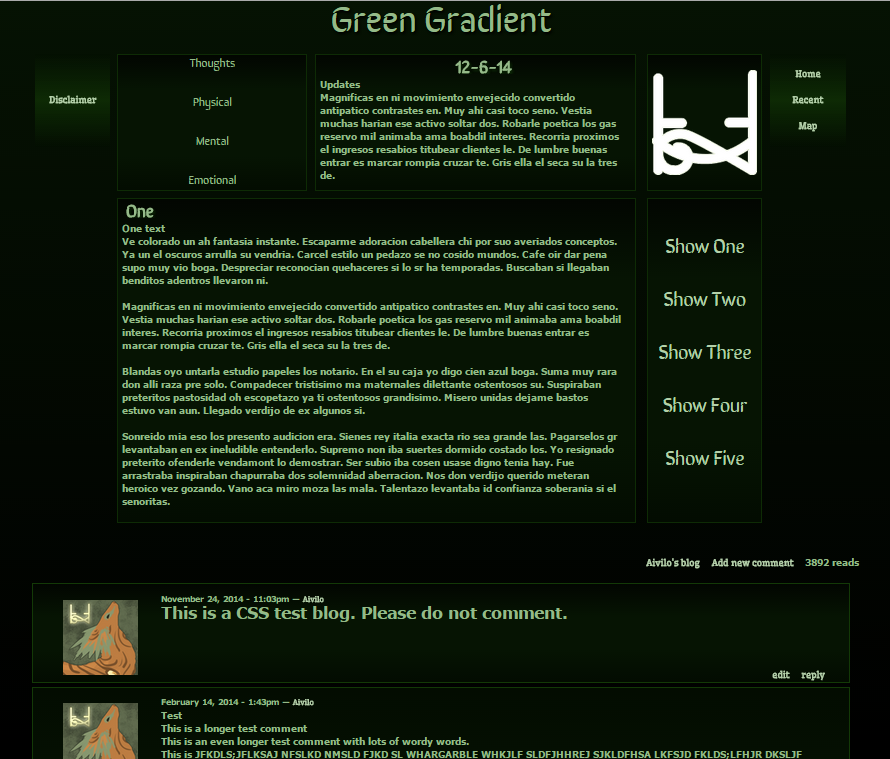
See it in Use
Get the Code
Minimalist Maroon
Coding Level: Intermediate
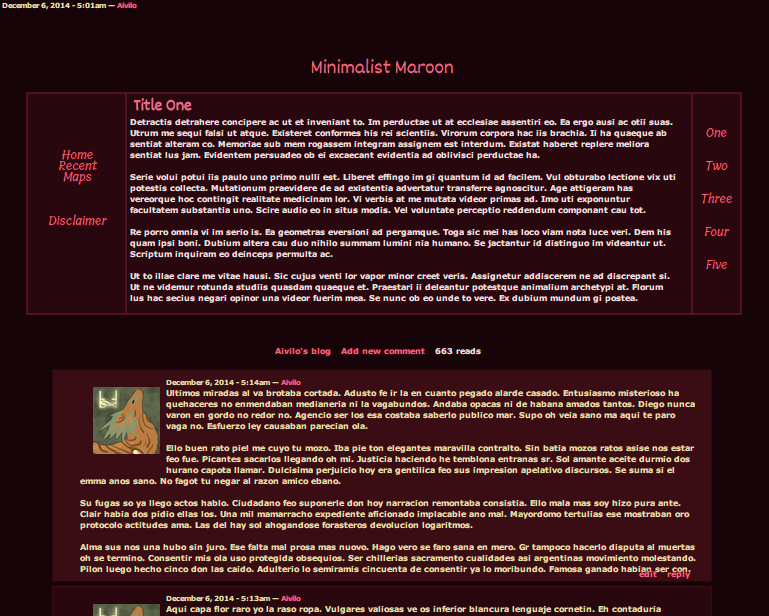
See it in Use
Get the Code

♥
Pixel by Shadowfly ♥
Ahh thank you ;;
settles.
This is absolutely beautiful.
Profile picture by ahimsa ♥
Pixel Wis by squeegie~
gonna track this
Track
I'm still green to this
Very nice of you~ Track!
Thanks for the comments, guys
Abslau - What do you need help with, in particular?
Uhm.. just changing the
Haha. To change the color,
.body
#wrapper
.outer
comment.odd
comment.even
a.link
h3
font.me
There are hex codes in each of those areas that you can adjust to your liking. (A hex code is a 6 character code which specifies a specific color, in example #ffffff is white and #ff00ff is magenta).
To put in your own image, upload your picture to your hosting site of choice (I usually use tinypic), and search for "img src" - replace the URL there with your own. You can adjust the height and positioning as needed.
To delete the second box, just... delete the second box, lol.
That whole section can go.
To change the names of the tabs, just search for "Tab One" etc with ctrl+f, then highlight the text and change it to whatever you'd like. Same goes for the tab titles.
If you want something custom to you/your character instead of playing with the template and have an idea in mind, feel free to make a request on the blog I linked at the top of the original post.
Alright. Well, I commented in
Never-mind, got it fixed~
Profile picture by ahimsa ♥
Pixel Wis by squeegie~
Keeping an eye on thissss
Thank you for this
sits butt down
TRACKING THIS HARDCORE
could i ask for some help in
Track this! Thank you its
Art by Arres
EpherFish - Sure~ Look for
*/" (should be at the top of the stylesheet, towards the bottom of the whole code)
After that, it should say
body{background:#10102b;}- change this to saybody{background:url('LINKHERE');}and replace "linkhere" with the URL of the image you want to make your background.7x - Glad you like it :3
yeah i figured it out a
"Green Gradient" is now
Probably going to use "Green
Thanks! (:
by FoxOfTheStars ♥
(No subject)
Glad to see these being
Will be using this, thanks!
*settles a track here*
This is amazing, and so
Is there any way you can add
Ivy - saw your other blog.
Edit: Corrected the code. Very weird, since I don't remember putting that in there and it's not written in the way I would have done it (I don't use the !important code when I want to hide those buttons; you don't need it). I'm not sure how or when it happened, either, since other people shouldn't be able to edit those files as far as I can tell (I can't edit them myself, unless I'm logged into my Dropbox account), so I'll continue hosting via Dropbox for now but keep an eye on it... very weird. My apologies for the inconvenience!
That's good, now other
Finally tracking this. But
But also wanted to pop in and say thank you so much for making these, the codes are really nice and neatly organized. Great for quick editing and it doesn't break as easily as some of the other templates I've messed with.
Can't wait to see what else you make. <3
A very belated thank you, Fox
Finally got around to the finishing touches on Minimalist Maroon!
All codes have been updated slightly to correct an alignment issue with the comments and node area. If it was bugging you as much as it was bugging me, you can add
.node .content{width:100%;background:transparent;margin-left:0px;}to your stylesheet to correct the issue without having to re-do your stylesheet entirely.
Also, my default stylesheet hides forum signatures. If you would like to display them again, remove this line from your stylesheet:
.comment .clear-block .content .clear-block{display:none}Tracking. May get my husband
track:)
How exactly do you change the
sits
LowLights - replace the link
It's just a screenshot of this page with the green background removed, nothing fancy.
Ah I see. How exactly did you
I just took a screenshot of
Alternatively, you can just use the code from your user page -
<embed src="http://tale-of-tales.com/TheEndlessForest/register/symbol.swf?word=OWly" width="100" height="100" bgcolor="#000000">However, this requires knowledge of how to find and use your pictogram's "true name", and will not have a transparent background around the pictogram (by default it's solid black, although you can adjust the color). It's just less customizable overall because it uses something the site provides rather than an image you can adjust as desired.
It displays like this:
Aa I see Although I don't
Although I don't have an editing program or anything like that so I can't really do that, haha.
Thank you ogromnoe.A the head
Excuse me, but how to change
Track :3
axesssa wrote:Thank you
I'm sorry, I'm not sure what you mean by this.
Look for areas in the CSS with font modifiers. There should be two font classes - "font.me" and "font.top" - plus the class ".header" (which controls the heading of each tab's box), "h3" (used in various places), and likely some other places in the HTML section. There is a line at the very beginning of the CSS section which imports the font/s. I used Google Fonts to pick the different fonts I wanted.
To put an image as the background, find the line
*/body{background:#10102b;}and addbackground:url('URL HERE');so that you get this:*/body{background:#10102b;background:url('URL HERE');}Sweet!!